Beginner Tips for Windows 10
Windows 10 Tips and Tricks for Beginners
1. Learn Useful Touchpad Gestures
My work requires me to use both Mac and Windows on a regular basis. One of the things that I used to miss a lot about macOS operating system whenever I was using Windows was the gestures. All that changed after Microsoft released full support for touchpad gestures in Windows 10. Now, if your laptop is using Windows precision drivers, you will get access to a ton of built in gestures on your PC which will make it easier for you to navigate the user interface, and switch between apps.
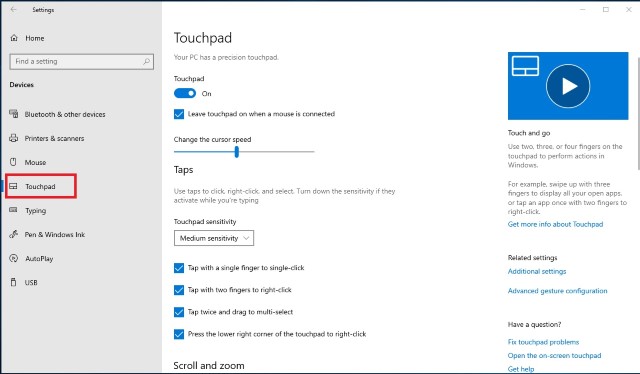
The new gestures include using two-finger swipes to scroll through a document or web page, three-finger swipes to switch between apps and launching the multitasking view, four finger swipes to move between virtual desktops and a number of other gestures and taps. To find what all you can do with the touchpad on your Windows 10 machine and disable or enable these gestures, just go to Settings -> Devices -> Touchpad and interact with the options present there. I am telling you, once you have mastered the gestures, you will never be able to go back.
2. Use Storage Sense to Manage Storage
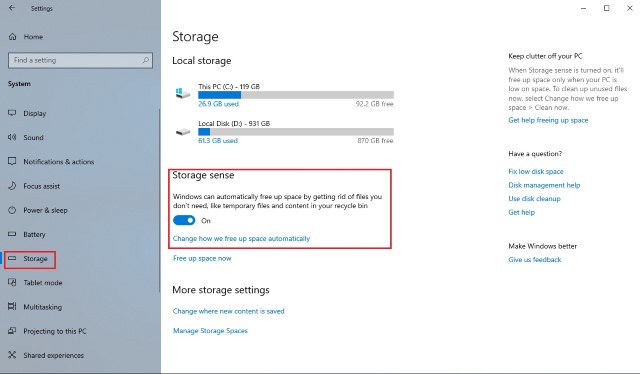
One of my favorite new features in Windows is its ability to automatically delete temporary and junk files to release storage on your device. This feature is not enabled by default so you will have to go back into the Settings app to turn it on. To enable this feature, go to Settings -> System -> Storage and turn on the toggle under the “Storage Sense” option. With this turned on, Windows will automatically delete unnecessary files such as temporary files and files in your trash to release storage on your device. You can further customize this action by clicking on the “Change how we free up storage” option below the toggle. This feature is especially meant for people who are always running low on disk space.
3. Turn on Night Light
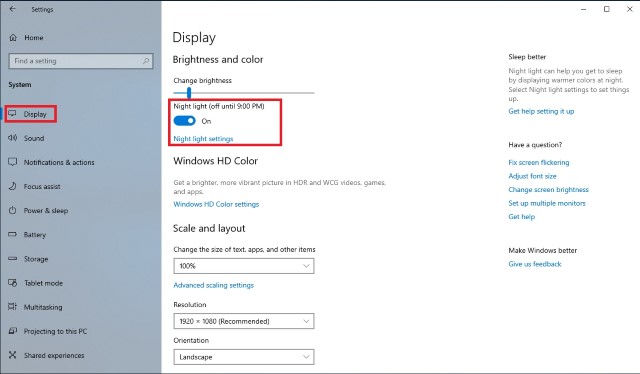
Another small but nifty addition to Windows 10 is a feature called Night Light. What this feature does is that it removes all the blue light from your screen which is a big reason behind why we remain awake late at night. If you work on your laptop in the night and don’t want it to affect your sleeping habits, you need to turn this feature on. You can either manually enable this feature whenever you want to or you can schedule Night Light which will enable this feature at a specific time of day. To enable Night Light, go to Settings -> System -> Display, and turn on the toggle next to Night Light. You can also configure the intensity of Night Light and schedule its time by clicking on the “Night light settings” option marked in the picture below.
4. Quickly Access Emoji Keyboard
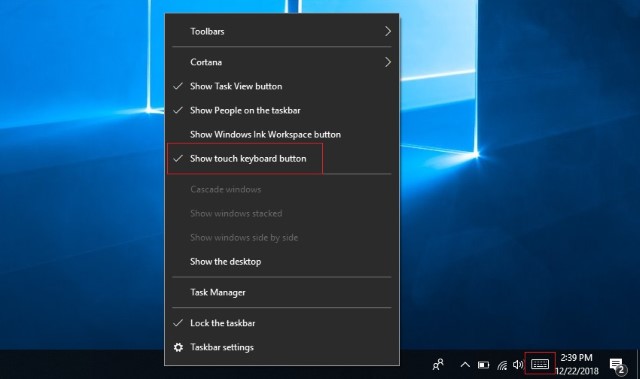
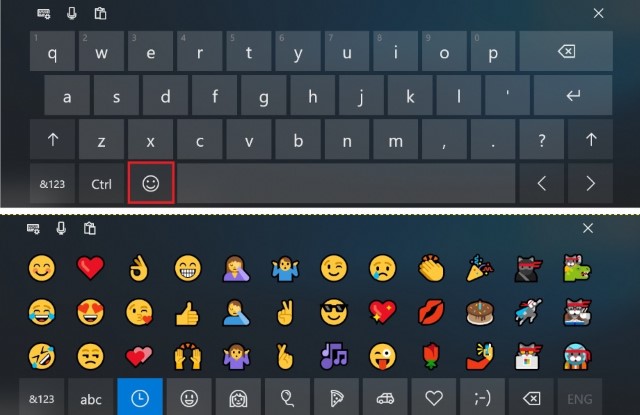
Emojis have become more popular than anyone could have ever imagined and while it’s easier to access them on a mobile device, there is no apparent way to quickly access emojis on your Windows machine. Not many people know about this feature, but Windows 10 actually allows you to quickly access an emoji keyboard with just a few clicks. All you need to do is enable this feature first. To access emoji keyboard first enable the virtual keyboard button by right-clicking on the Taskbar and clicking on the “Show touch keyboard button”.
Now, whenever you want to access emoji keyboard, first click on the touch keyboard button in the bottom right and then click on the emoji symbol. Here, you can select and use all the emojis that you want to.
5. Turn on Dynamic Lock
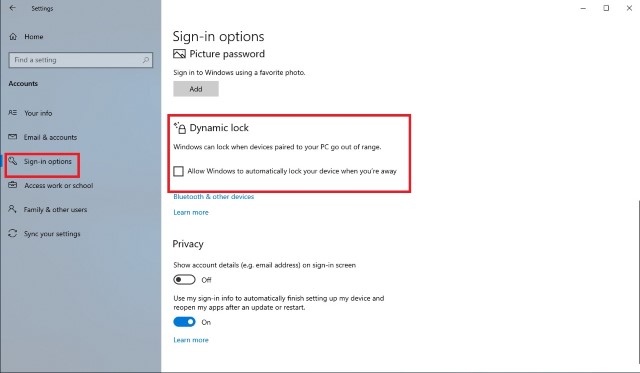
If you are someone who constantly forgets to lock his Windows PC whenever he moves away from it, then this tip can save you a lot of hassle. When turned on, this feature will automatically lock your system whenever you walk away from your work-desk. Basically, the feature uses Bluetooth connection with your phone to determine if you are near it or not. Once your phone is out of the range when you walk away, your system will automatically lock down. You can enable this feature by going to Settings -> Accounts -> Sign-in Option and turning on the “Dynamic Lock” feature. Once you enable this feature, you will have to pair your smartphone to your Windows PC if you have not already done so. I really love this feature and I cannot explain how many times it has saved me a trip back to my PC just to lock it down. If you are half as forgetful as I am, you should definitely enable this feature to save your information from prying eyes.
6. Turn on the New Screenshot Tool
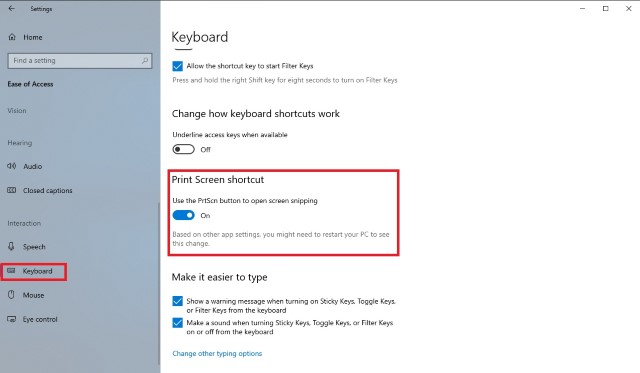
Since I write a ton of how to articles I take a ton of screenshots on a daily basis. Previously, taking a screenshot on Windows was not as intuitive as users had to jump through a lot of hoops if they wanted to capture a part of the display and not the entire display. However, the new screenshot tool alleviates this problem by giving users more control. As it is with most of these features, it is not turned on by default and you will have to enable it by going into Settings. Just go to Settings -> Ease of Access -> Keyboard and turn on the “Print Screen Shortcut”. Once you have done this, whenever you hit the Print Screen button you will be presented with three options. You can either capture the entire desktop, capture a part of the desktop, or capture a part of the desktop in free form. Once you capture the screenshot it will open in a window where you can also easily annotate it, and share it with anyone you want to.
7. Privacy Settings
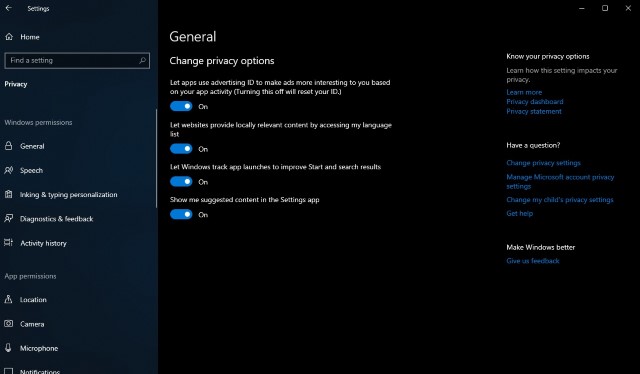
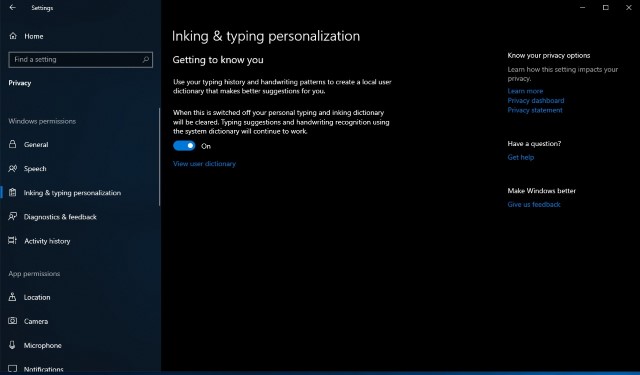
If you are concerned about your privacy and don’t want Microsoft to attain certain types of information on your (such as location data, getting to know you features, and more), then it would do you good to spend some time in the Privacy Settings to figure out what you want and don’t want to share with the company. First of all, go to Settings -> Privacy -> General and turn off all the toggles if you don’t want Windows to track users habit and show you suggestions based on your behavior.
Then go to “Inking and typing personalization” and turn it off. This will restrict Windows from tracking your typing and inking history. Similarly, you can click on other options such as “Diagnostics and Feedback”, “Activity History”, and more to disable sharing of your information that you don’t want to. To be fair, Windows records your usage to give you a better service, however, if you are not comfortable sharing your information with Microsoft, you should certainly switch these things off.
8. Record Screen using Xbox app (Built-in Screen Recorder in Windows 10)
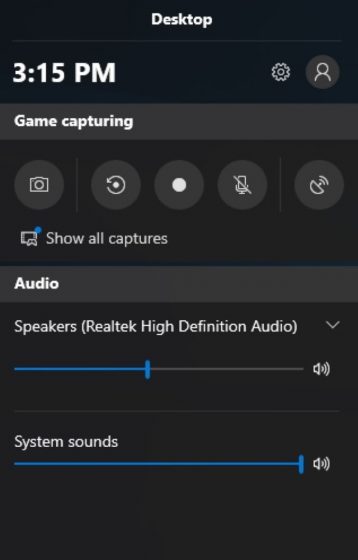
Not many users know this but Windows 10 allows you to record your screen without any external app. In fact, not only you can record video but also both system and mic audio. The feature is called “Game Capture” however it works with any app that you are using. I have used this app to record countless short tutorials for my friends and family. I love this feature as it is very easy to invoke. All a user needs to do is hit the “Windows+G” keyboard shortcut and a recording menu will open. Here you can set your preferences and then hit the record button to start your recording. While this tool is not really feature rich, it definitely is easy to use, and being available natively makes it one of the best tools for capturing and sharing a small recording of your Windows PC.
9. Enable Dark Mode
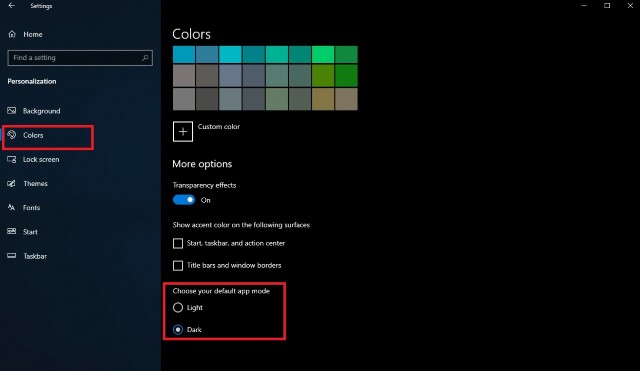
One of the most requested features by Windows users has finally been introduced in Windows 10. Users can now easily enable Dark mode by going to the Settings app. To enable dark mode go to Settings -> Personalization -> Colors and scroll down and enable the dark mode. What I love about the dark mode here is that it’s truly dark so you are not getting that dark gray color which you generally see on other operating systems. Also, since this is a system enabled dark mode, all your navigation panels in every app, including Settings, File Explorer, and more turn to dark mode. That said, the feature still needs refining especially in the File Explorer as currently, it makes it a little hard to find things you’re looking for.
10. Start using Windows 10 Virtual Desktops
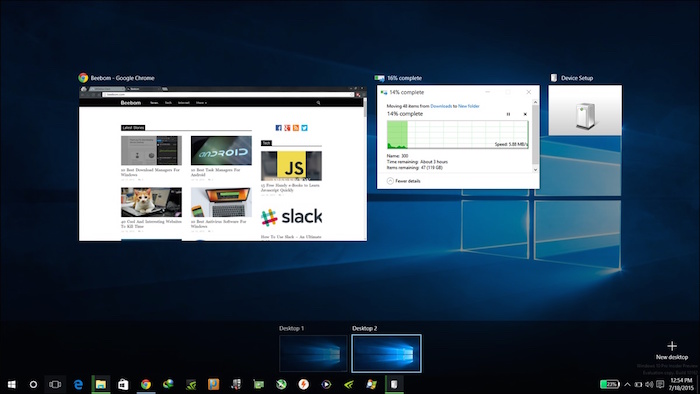
Microsoft has finally brought out-of-the-box support for virtual desktops, which was available in Linux and OS X for very long time. Virtual desktops feature allows you to better manage the opened applications and windows by clubbing them in groups.
Any one of the virtual desktop (or the app group) can be active at a time, and thus offers an uncluttered Tasks View. To get started with virtual desktops, open the Tasks View by clicking on its icon on the taskbar (present at immediate right of the Search bar) or hold down Win + Tab keys.
11. Learn new Windows 10 Keyboard Shortcuts
You can become more productive if you learn the shortcuts to perform various regular tasks such as using virtual desktops, snapping apps and more. Below are the shortcuts to help you do things faster.
- Win + Tab (open Tasks View)
- Win + Left + Up (move app to top-left quadrant)
- Win + Left + Down (move app to bottom-left quadrant)
- Win + Right + Up (move app to top-right quadrant)
- Win + Right + Down (move app to bottom-right quadrant)
- Win + Ctrl + Left or Right (change virtual desktops)
- Win + Ctrl + D (new virtual desktop)
- Win + Ctrl + C (speak to Cortana)
- Win + S (view weather, news, sports, help, etc.)
- Win + Ctrl + F4 (close virtual desktop)
- Win + Up and Down (snap apps to top or bottom of screen or maximize them)
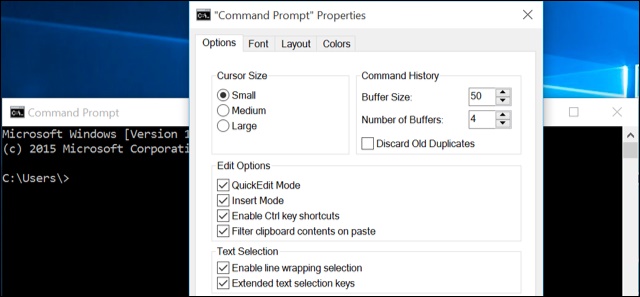
12. Get Familiar with the new Command Prompt
Command Prompt in the new Windows comes with the ever-demanding feature. It has become more accessible than ever by supporting the standard copy and paste options. From now on, you can easily copy and paste the text content in the command prompt (cmd.exe) using the Ctrl + C and Ctrl + V key combinations respectively. Moreover, it packs lots of customizations under the Properties option.
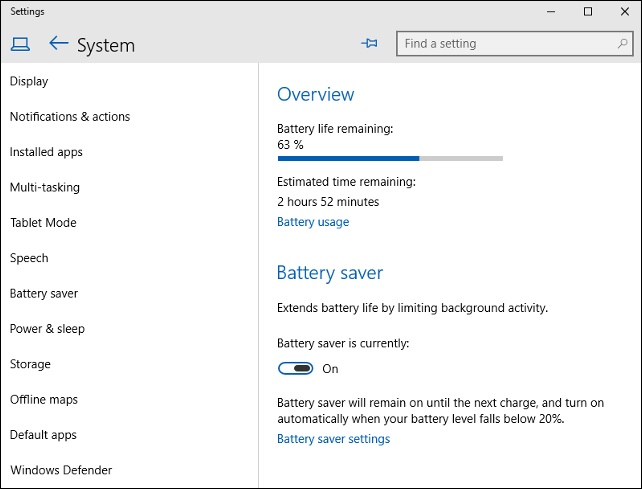
13. Improve Battery Life in Windows 10
Windows 10’s battery saver feature can help you if your laptop’s battery is running low. It is smart enough to throttle the background processes and threads to limit the power usage and save power to allow your machine to last longer. It is better than power-saving modes found in previous Windows releases and can be enabled using this procedure: click Start menu > Settings > System > Battery saver.
14. Sideload non-Store Apps in Windows 10
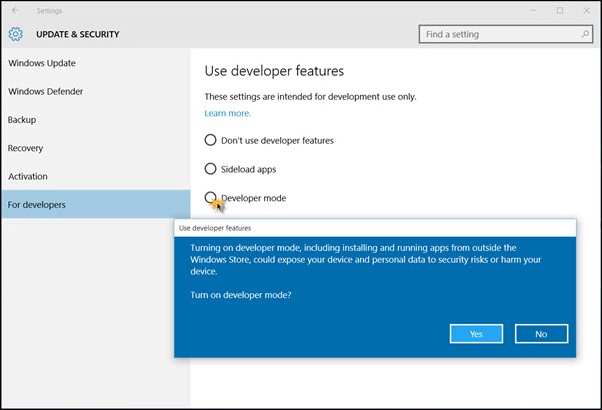
Windows 10 supports sideloading of apps, which allows you to download and install applications outside of Microsoft Store. There are lots of apps that are not available on the Store and those can be installed using this trick. Sideloading of apps is only allowed for developers, and thus you need to enable developer mode before installing non-Store apps.
To enable the developer mode, open Start menu > Settings > Update & Security > For developers, and select Developer mode. After you’ve become developer for your system, enable sideloading of applications by going through the steps: launch Start menu > Settings > Update & Security > For developers, and select Sideload Apps. That’s all, you can now download and sideload apps.
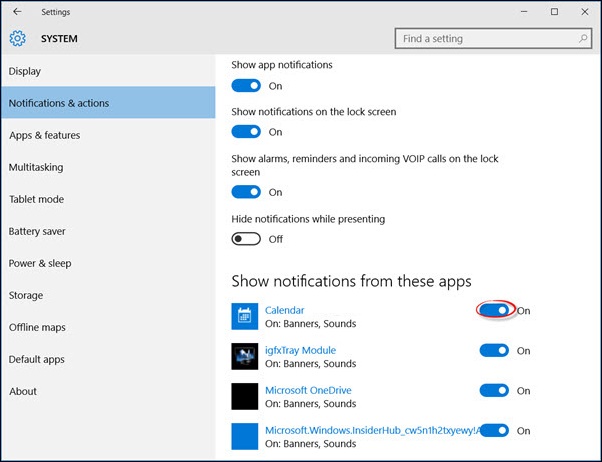
15. Turn off Windows 10 Notification and System Sounds
Notification and system sounds are used to alert the user whenever an important action is performed. In order to turn off the system sounds in Windows 10, you need to do the following steps: right click the Speakers icon on the taskbar > Sounds, and choose No Sounds under Sound Scheme and press OK button. To disable all the notification sounds for all the apps, open the Start menu > Settings > System > Notifications, and toggle off Show app notifications. Please note that it will also turn off all the notifications and not only the sounds for the notifications.
16. Move or Install Apps to Another Drive
Windows 10 Apps are the Metro Apps that were introduced in Windows 8. They are by default installed in the C (System) partition, but if you want to make space by moving them to another drive, here is what you need to do: go to Start menu > Settings > System > App & Features, and click on the app you want to move, select Move, select a drive and click Move to move the app.
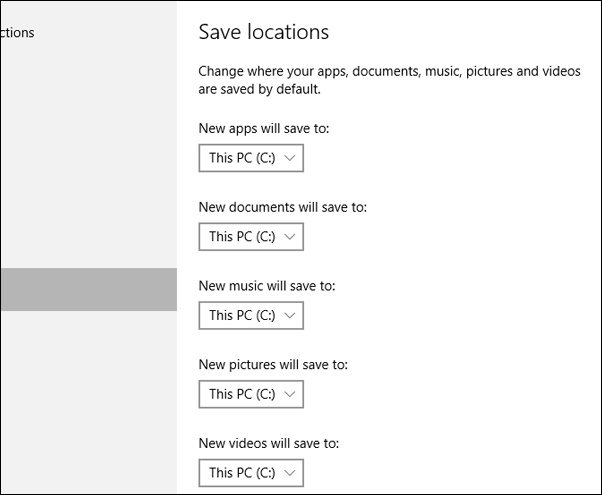
Moving apps one by one can be painful if you’ve lots of installed applications. You will find changing the default install location much easier and convenient than moving apps. To change the default location for installation of Windows 10 apps, open Start menu > Settings > System > Storage. Click on Save locations, select any drive for New apps will save to. This feature may not be available in some editions but possibly be offered soon through an update.
17 Use Snap Assist
Windows 10 has better snapping capabilities and tries to assist you while you snap apps using the mouse. When you try to snap an app and some part of the screen is still empty, Snap Assist feature shows up with a thumbnail list of open windows. You can choose any one app/window from the list to snap it to the left or right of the screen along with your previously snapped app’s window.
18. Use Windows 10 Hello
Windows Hello is a system-level biometric authentication system. It’s claimed to be much safer technology than traditional passwords, and provide you instant access to your Windows devices. However, your device needs to have support for fingerprint or camera for this feature. You can head to Start menu > Settings > Accounts > Sign-in options, find the entry for Windows Hello and options to setup either a face or fingerprint, and after setup, you can use yourself to login to your Windows 10.

Bonus: Customize Windows 10 Start Menu
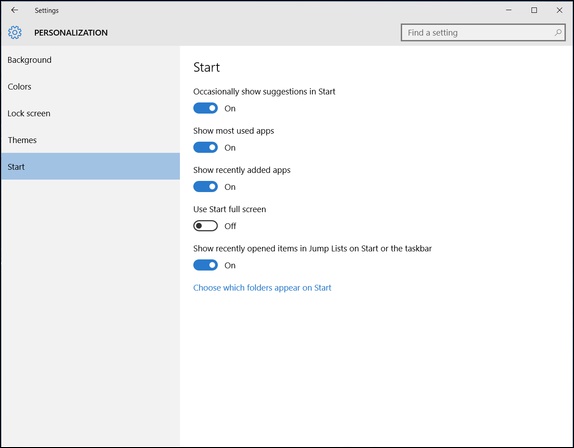
Windows 10’s Start menu is a melding of two worlds – the Start menu from Windows 7 and the Start screen of Windows 8. It’s beautiful and user-friendly than ever, and comes with a bunch of all new customization options. To pin an app, right click it on Start menu and select Pin to Start. To unpin a tile, right click it and choose Unpin from Start. Right clicking a tile gives more options like resize, etc. To create a group of tiles, drag a tile to empty space in Start menu until a horizontal or vertical bar appears, and then you can drag more apps there to create a group.
As a matter of fact, we have a detailed article on how to customize Windows 10 start menu, you should definitely check it out to learn more on this.


Comments
Post a Comment