You Can Now Schedule Emails in Gmail
The feature works pretty much how you’d expect it to work. You can write your email whenever you want, and schedule it to be sent at a later date and time of your choosing. This can come in very handy for people looking to send birthday greetings on time, but who keep forgetting. Anyway, here’s how to use the feature on the Gmail app on Android, and on the Gmail web app.
How to Schedule Emails in Gmail on Mobile
To schedule an email on your smartphone, just follow the steps below.
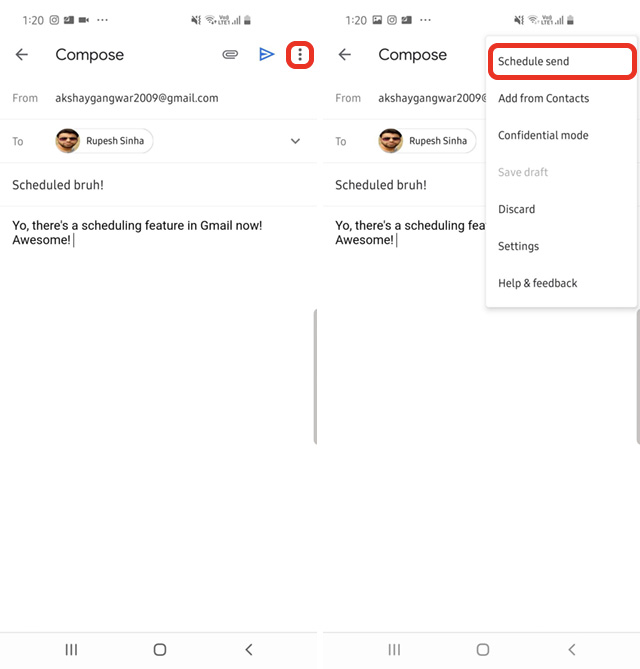
- Launch the Gmail app, and compose a new email. Once you’re done with that, tap on the three dot menu on the top right, and tap on ‘Schedule Send.’
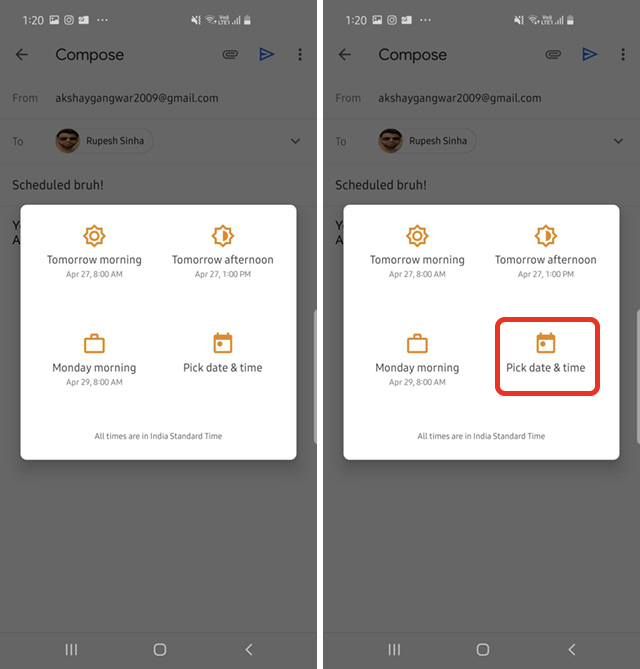
- You will now be able to choose between the preset times, or pick a date and time of your own choosing by tapping on the last icon.
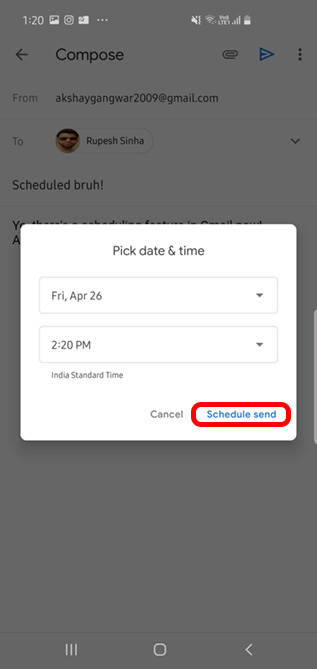
- Once you’re done, just tap on ‘Schedule send‘ and that’s it. Gmail will schedule your email and it’ll be sent automatically at the time of your choosing.
If you want to take a look at your scheduled emails, you can simply head over to the hamburger menu in Gmail, and tap on ‘Scheduled’ to see all the emails you have scheduled.
How to Schedule Emails in Gmail Web
The same scheduling feature is also available on the web-version of Gmail, so if you’re using that, here’s how to schedule emails:
- In Gmail, compose a new email. Once you’re done, click on the drop-down arrow on the ‘Send’ button.
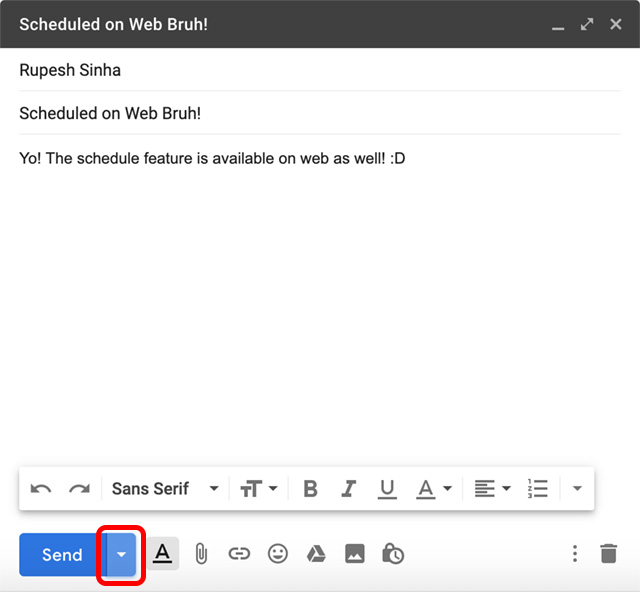
- You will see a new ‘Schedule Send‘ option here. Click on it.
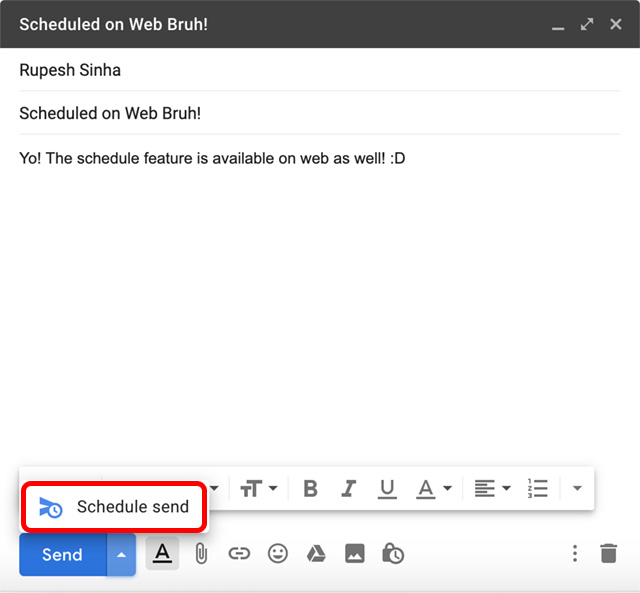
- Here, you’ll be able to pick a scheduling time from available presets, or you can click on the ‘Pick date & time‘ option to choose exactly when you want Gmail to send the email.
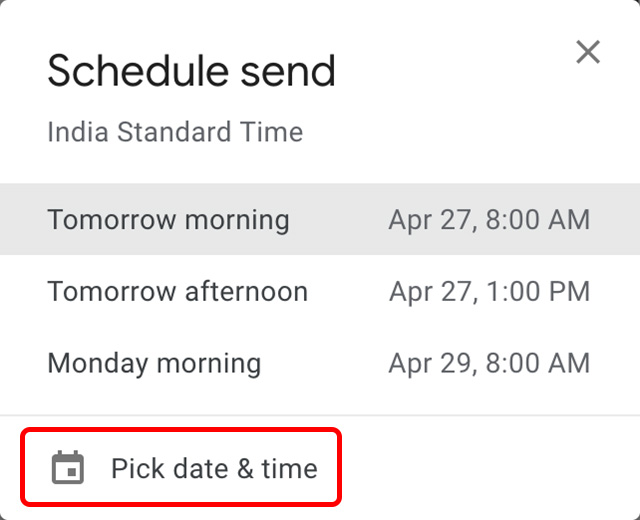
- That’s it, Gmail will schedule your email according to the time you’ve chosen.
As it was with the mobile app, if you want to take a look at your scheduled emails, you can click on ‘Scheduled’ in the side-bar.
via : Beebom


Comments
Post a Comment